Parenting is a very tough job. We place a huge amount of burden on ourselves to make our kids smart. We've seen so many things.... Your Baby Can Read, Baby Einstein, Baby Mozart, etc. Do they really work? So far most of them have been debunked. So what should we focus on with our babies/ children? I think the most valuable thing we can do as parents is interact and communicate with our children. I am very skeptical that plopping a baby in front of a television to watch some educational video is going to make them a genius. Do our kids need to be geniuses anyway? That seems like an awful lot of pressure.
One fad I am in favor of is baby sign language. I really love it. Why? Because it actually helps out with one of the most frustrating parts of being a parent of a baby or toddler... communication. I don't know how many times I have asked, "What are you trying to tell me?" And I am sure that in his frustrated scream he is saying, "Why aren't you listening to me?" Baby sign language actually helps. Babies develop their motor skills and their understanding of language earlier than their ability to speak it. Baby sign language bridges the gap.
One research study found that babies taught sign spoke sooner than their peers, maintained more advanced verbal skills up to about 3 years of age, and had an average of 12 point higher IQ at the age of 8. These findings sound nice, but that was not my motivation behind teaching my son baby sign. I am teaching him sign because:
1. Communication: He is able to express what he wants/needs/feels. It feels wonderful as a parent to understand what your child wants/needs.
2. Bonding: spending time doing anything with your baby enhances the parent-child bond. In addition, when a child is able to communicate and have their needs met, it also improves bonding.
3. Fewer Tantrums: Tantrums are a normal part of child development. They don't know how to deal with frustrations and emotions yet, and that is ok. Baby sign is not going to end all tantrums, but it will cut down on frustration related to trying to communicate.
4. Self Esteem: Learning something new feels really good. So does being listened to and understood. Confidence and self esteem are important things to foster during child development.
Myths about Baby Sign:
Myth 1. Baby sign language will make your baby talk later because he will be content signing. This is not true. Just as a child that first learns to crawl will still learn to walk, signing does not take away a baby's interest in speaking. Several studies have been done to address this issue and all have found that signing babies speak just as soon or sooner than their non-signing peers.
Myth 2. Baby sign language is difficult to learn. You don't have to teach you baby the ASL language in its entirity to use baby sign. You can teach your baby only 10 signs if you want. You can even make the signs up yourself. As long as you and your baby understand eachother you can do whatever you want.
Myth 3. Baby sign language is very expensive/time consuming. You don't have to go to a baby sign class to learn it. Like I said, you can make up your own gestures/signs if you want. It doesn't take any extra time because you can thrown signs in to your daily routine. As you play and talk with you baby, you can sign at the same time.
Sources:
http://deafness.about.com/od/babysigning/f/signspeech.htm
http://deafness.about.com/cs/signfeats1/a/babysigning.htm
http://www.babies-and-sign-language.com/baby-sign-benefits.html
http://psychcentral.com/lib/2009/teaching-your-baby-sign-language-can-benefit-both-of-you/
http://www.babyzone.com/baby/baby-development/sign-language-made-simple_65814
http://theparentsite.com/parenting/signbaby.asp
http://www.babysignlanguage.com/basics/research/
https://www.babysigns.com/index.cfm?id=64
http://www.mayoclinic.com/health/baby-sign-language/AN02127
Tuesday, August 21, 2012
Monday, August 13, 2012
Car Seat Safety
I consider myself a fairly well-informed mother but even I was lagging in the most recent car seat recommendations, and I'm not the only one. In a 2005 study conducted for the National Highway Traffic Safety Administration (NHTSA) found that 80% of infant and toddler car seats were used improperly. Yikes! It is so hard to keep up with all the changing laws and recommendations so I thought I would spread the word about some basic car seat guidelines.
1. It is very important to make sure you secure your child into the harness properly. The federal law states: "A snug strap should not allow any slack. It lies in a relatively straight line without sagging. It does not press on the child's flesh or push the child's body into an unnatural position." Most parents do not tighten enough for fear of hurting their child but think of how much it would hurt if the child were not properly restrained in a car accident. The chest clip should be at armpit level. In addition, the harness straps should be adjusted into slots that are at or below the child's shoulder height.
2. The most state laws require that all infants must remain rear-facing until they are at least 1 year old AND 20 pounds. This does NOT mean that you can turn your child forward-facing before their first birthday if they weigh more than 20 pounds. In addition, the American Academy of Pediatrics (AAP) recommends that the child remains rear-facing until they are at least 2 years old or have exceeded the weight/height limit for rear-facing (which varies depending on the car seat). This may seem extreme but the recommendation was made in light of a 2007 study published in the journal of Injury Prevention. The study found that the rear-facing position does a better job at supporting the child's head, neck, and spine during a crash because of the way it distributes the impact. Some organizations have recommended keeping your child rear-facing for even longer.
3. The safest place for your infant is the center of the back seat. It has long been recommended that child under the age of 12 sit in the back seat due to potential injury from airbags. The center is the safest because it protects the infant best from side-impact collisions. According to a study performed at University of Pennsylvania School of Medicine, "Children seated in the center rear had 43% lower risk of injury compared with children in the rear outboard position."
4. Be sure to read your car seat's owner manual thoroughly so you know the limitations of that particular car seat. Also make sure you check into your state laws, as each state has different requirements. More importantly, I am not a mom that is satisfied with minimum requirements. If you would like to find out more about the most recent recommendations and studies, find a nationally certified Child Passenger Safety Technician (CPST). They should have the most current information. Here is a link: https://ssl13.cyzap.net/dzapps/dbzap.bin/apps/assess/webmembers/tool?pToolCode=TAB9&pCategory1=TAB9_CERTSEARCH&Webid=SAFEKIDSCERTSQL
Sources:
http://www.parenting.com/article/car-seats-safety
http://www.healthychildren.org/English/safety-prevention/on-the-go/Pages/Car-Safety-Seats-Information-for-Families.aspx?nfstatus=401&nftoken=00000000-0000-0000-0000-000000000000&nfstatusdescription=ERROR%3a+No+local+token
http://children.webmd.com/news/20080507/safest-spot-for-babys-car-seat
http://www.car-safety.org/rearface.html
http://www.ghsa.org/html/stateinfo/laws/childsafety_laws.html
Tuesday, August 7, 2012
Question your Induction
I want to be
clear, I believe that women should make decisions for themselves with regards
to birth, and I am not writing this to criticize anyone's decisions. I am
writing this because I feel that the true risks of medical induction of labor
are not accurately explained to women. Nothing irritates me more than the
withholding of information. My goal is to inform, not to criticize, scare, or
coerce.
A medical labor induction is a procedure in which labor is started by artificial means. The most common means of labor induction is the use of Pitocin, a synthetic form of oxytocin. There are many reasons that inductions are performed, many of which are legitimate (such as preeclampsia, deterioration of the placenta, and premature rupture of membranes without onset of labor). However, elective inductions are on the rise. An elective induction is a medical induction that is performed for reasons other than a medical need. This practice is not recommended by ACOG (the American College of Obstetricians and Gynecologists) or the WHO, yet many OB/GYN's suggest and even pressure patients into elective inductions for reasons of convenience. I find it absolutely appalling that they do this without informing their patients of the true risks involved.
Risks of induction include abnormal fetal heart rate, shoulder dystocia, fetal distress, increased risk of NICU admission, increased risk of vacuum- or forceps-assisted delivery, increased risk of C-section, increased risk of baby prematurity and jaundice. Not to mention the risks associated with a Cesarean section. Often reasons for induction outweigh the risks, but are these risks justified for the sake of convenience?
Here are some statistics involving Medical Inductions and Cesarean Sections in the United States:
The end of a pregnancy is not much fun. Elective induction can begin to sound very appealing. But before you schedule an elective induction, take a look at the risks and really ask yourself if it's worth it to you. Medical induction is one of the many incredible medical advancements we have available to us, but these interventions should only be performed if the benefits outweigh the risks.
Sources:
http://wellroundedmama.blogspot.com/2011/07/induction-triples-risk-for-cesareans-in.html
A medical labor induction is a procedure in which labor is started by artificial means. The most common means of labor induction is the use of Pitocin, a synthetic form of oxytocin. There are many reasons that inductions are performed, many of which are legitimate (such as preeclampsia, deterioration of the placenta, and premature rupture of membranes without onset of labor). However, elective inductions are on the rise. An elective induction is a medical induction that is performed for reasons other than a medical need. This practice is not recommended by ACOG (the American College of Obstetricians and Gynecologists) or the WHO, yet many OB/GYN's suggest and even pressure patients into elective inductions for reasons of convenience. I find it absolutely appalling that they do this without informing their patients of the true risks involved.
Risks of induction include abnormal fetal heart rate, shoulder dystocia, fetal distress, increased risk of NICU admission, increased risk of vacuum- or forceps-assisted delivery, increased risk of C-section, increased risk of baby prematurity and jaundice. Not to mention the risks associated with a Cesarean section. Often reasons for induction outweigh the risks, but are these risks justified for the sake of convenience?
Here are some statistics involving Medical Inductions and Cesarean Sections in the United States:
- In 2009, the
C-section rate in the U.S. was 32.9%. That is 1/3 of all births! The WHO
has stated that a C-section rate higher than 15% is a cause for concern.
- In 2008, the
induction rate in the U.S. was 23%. Of those inductions, 40% were elective
(for reasons other than medical need).
- A labor that is
medically induced is twice as likely to end in C-section than a
spontaneous labor.
- A recent study
published in the journal Obstetrics
and Gynecology found that more than
43% of women expecting a first baby were induced. Of these nearly 40% were
being induced for convenience. More than 1/3 of women undergoing induction
for convenience had a cervix that was known to be unfavorable for
induction. Using a very conservative analysis, the authors estimate that
fully 20% of all C-sections done at their institution were the result of
inductions for convenience (Ehrenthal et. al., 2010).
- Another
study found that
first-time mothers with an unripe cervix who were induced had a 42% C-section
rate in labor (Thorsell, et.al., 2011).
The end of a pregnancy is not much fun. Elective induction can begin to sound very appealing. But before you schedule an elective induction, take a look at the risks and really ask yourself if it's worth it to you. Medical induction is one of the many incredible medical advancements we have available to us, but these interventions should only be performed if the benefits outweigh the risks.
Sources:
http://wellroundedmama.blogspot.com/2011/07/induction-triples-risk-for-cesareans-in.html
Wednesday, August 1, 2012
Snack Successfully
It is so tough to get started with a healthy diet when your kitchen is packed full of junk food. It is hard in the beginning to resist the urge to grab a few potato chips everytime you walk by the bag or grab a hot pocket instead of making a healthy sandwich. If this sounds like your kitchen, its time for a clean-out. Here are some tips to making your kitchen more health conscious:
1. Throw out the crap. You don't need it, you won't miss it, and you need space for better choices.
2. Time to clean the refrigerator. You know, one of those deep cleans: throw out all the fuzzy leftovers lurking in the shadows, scrub the hardened ketchup off the shelf, and throw away the shriveled up lettuce that you think you can save. Its time to start with a clean slate.
3. Empty out a cupboard and designate it as your snack cabinet.
4. Fill the cupboard with healthy snack options.... canned tuna, low sodium nuts like pistashios or almonds, healthy protein bars, healthy popcorn, etc. I did weight watchers so I would write the points value on the package with a sharpie so I could open the cupboard and pick something without having to look it up.
5. Get some fruit & veggies to snack on. I like to wash everything when I get it and cut it up so all I have to do is open the fridge and grab it when I need it. Carrot sticks, strawberries, apples, jicama, pineapple, etc.
6. Identify your weaknesses and don't buy them. It is ok to have a square of chocolate, and for some people it may work to satisfy their sweet tooth. However, if eating one makes you want to eat 12 it is not a good choice for you. Everyone is different. You need to identify what works for you and set up your kitchen to accomodate what works.
Friday, July 27, 2012
Baby Food 101
I don't know why but I thought that making my own baby food was going to be way too time-consuming to attempt. It sounds like something that would take all weekend and result in a disastrous mess in the kitchen, like canning. That couldn't be farther from the truth. I was shocked at how easy it was. I have really enjoyed making my own baby food. For the record, we do buy premade baby food still. There are some situations when it is just easier- i.e. when we are out of the house during mealtime. But with the bulk of our food homemade, it has really decreased costs. I have only been making baby food for a month or two but I really love it. Here are some of the tips I have so far:
1. You really don't need any baby food specific appliances. A food processor is really the only thing you need.
2. When cooking the ingredients for the baby food, be sure not to add oil, salt, sugar, or strong spices. If you do need a little oil, use it sparingly.
3. It is a good idea to buy organic produce for your little one. Also, try to buy in season. Vegetables and fruit begin to lose vitamins once they are picked. Frozen vegetables tend to retain more nutritional value if the fresh in-season version is not available.
4. A great way to make premeasured portions is to use a muffin tin. I have heard of people freezing the food in icecube trays. I suppose this would work, but I like the muffin tins better. I take a cheap fold-over sandwich bag or saran wrap and place it in the muffin cup then spoon the food into it. Then I wrap the plastic over the top of the food and put it in the freezer. Once frozen, I take the wrapped portions and place in a quart-sized freezer bag labeled with the flavor and date.
5. Don't be afraid to use short cuts. My favorite short cut is to use premade applesauce. Apples take awhile to cook and there is not a great selection of organic apples in my area. If you use premade applesauce make sure it is all natural, organic, and no added sugar. I have also used canned organic pumpkin and frozen organic vegetables.
6. My favorite components are:
- Avocado: It really adds a creamy, silky texture and it is packed with really healthy fat that baby's need. My favorite combo is Chicken-Apple-Avocado and I have also mixed it with cantaloupe.
- Sweet Potato: Babies love sweet potato and it is especially yummy when baked. Just pop it in the oven for about 40 mins while you are cooking dinner. It doesn't get any easier.
- Butternut Squash: This is another baby favorite and it is really easy to cook. Just cut it in half and roast cut side down in the oven for 30-40 mins. You can make it for dinner than reserve some for baby food.
Tuesday, July 24, 2012
Baby Steps
We have all heard the saying "You have to learn to crawl before you can walk." This phrase has very special meaning to me right now as I watch my little boy experiment with all kinds of creative modes of forward motion including his speed crawl, bear crawl, pushing around laundry baskets, and circling the entire perimeter of a room clinging to furniture and walls so he doesn't have to get on his knees. He is so close to figuring out this walking thing. He didn't get to this point over night though. He has been working towards walking since he was in utero. I know that not all babies crawl before they walk, but they all have to learn a lot of things first. In the past 7 months I have gotten so excited over all of my son's mini milestones. He first learned to hold his head up without support, then he was able to swat at a toy with his arm, he learned to kick his legs, he rolled over, he learned to hold his chest off the ground when on his tummy, he sat without support, then he started leaning forward from sitting to get onto all fours. It's not that impressive that he can hold his head up now, but it was a big deal when he was a newborn.
At the risk of sounding like a cheesy motivational speaker, I want to apply this to life in a broader way. Do some goals seem like too much for you right now? I felt this way when I started my weight loss journey. At the time it seemed too overwhelming to make so many changes. The truth is you don't have to switch from a diet of McDonald's to a raw food vegetarian overnight. I hate diet plans that rigidly expect you to completely transform your diet and lifestyle with the flip of a switch. It's just not realistic. Instead of an All-or-Nothing mindset, why don't you focus on making just one extra good decision a day. Get just a burger instead of a value meal. I know what you're thinking. This crazy lady is saying you can lose weight eating fast food burgers for lunch. No, that's not what I'm saying... I'm saying baby steps. If you can't give up the whole value meal, stop eating the french fries. You will realize you didn't need them anyways. Then you may find you would rather get a salad. You can apply it to exercise too. You don't have to go from a couch potato to a marathon runner overnight. Just get up a do a few loads of laundry. Turn the TV off and turn on some music. These are incredibly easy baby steps. You will be surprised how these little first steps will make you want more. You don't have to be just starting out to use this baby step philosophy either. No matter where you are in your journey you can always do one more little thing, so try it out.
Here are my little tips to starting out:
1. Don't be so hard on yourself. A negative attitude will get you nowhere. Tell yourself that you can do it. It may seem silly but it makes a really big difference. Talk to yourself like you would talk to a friend. If your friend is having a tough time, you wouldn't say "It's not worth trying, you're just going to fail." (If you would you probably don't have many friends.)
2. Set a small goal. You may want to lose 80 pounds or run a half marathon but that is going to take a while. Why don't you pick a small goal like losing 10 pounds or jogging 4 miles 3 days a week. These smaller goals will feel good to achieve and fuel your confidence for reaching bigger goals.
3. Don't let slips and hang-ups discourage you. You are not going to be perfect. My son falls over ten-thousand times per day but he gets right back up and tries again. If you do slip up, don't let it ruin the rest of your day. So you had a brownie for breakfast, it wasn't a great choice but that doesn't mean that you should give up and order a family-sized pizza for dinner. Take it one step and one choice at a time.
4. Start now. It is so easy to put it off. "I will start after my vacation", after my birthday, after Thanksgiving, after Christmas, after New Year's, after.... How about right now. You aren't doing yourself any favors by coming up with excuses, just take that first step now.
And in closing, I leave you with this recipe I swiped from someone else's blog, who apparently stole it from skirt.com:
Watermelon Water:

3 cups cubed chilled watermelon
1 cup coconut water
squeeze of fresh lime
Ice if needed
Sprig of mint
Put all ingredients in blender. Blend until smooth.
Makes two servings.
90 calories per serving.
http://skirt.com/dollybelle/blog/3-skinny-summer-blender-drinks-try
Note: I made this today and it was quite delicious. Of course I love watermelon, and I think coconut water is magical stuff. I did not have mint but it was still tasty. It didn't look like this picture though. It was a much deeper red color (I found a lovely deep red, super sweet watermelon) and it had a lot of watermelon pulp in it. If you don't like pulp you may want to strain this. I happen to like watermelon pulp though. I also spiked a glass of this with some dark rum so if there are typos in this post you will know why. ;-)
At the risk of sounding like a cheesy motivational speaker, I want to apply this to life in a broader way. Do some goals seem like too much for you right now? I felt this way when I started my weight loss journey. At the time it seemed too overwhelming to make so many changes. The truth is you don't have to switch from a diet of McDonald's to a raw food vegetarian overnight. I hate diet plans that rigidly expect you to completely transform your diet and lifestyle with the flip of a switch. It's just not realistic. Instead of an All-or-Nothing mindset, why don't you focus on making just one extra good decision a day. Get just a burger instead of a value meal. I know what you're thinking. This crazy lady is saying you can lose weight eating fast food burgers for lunch. No, that's not what I'm saying... I'm saying baby steps. If you can't give up the whole value meal, stop eating the french fries. You will realize you didn't need them anyways. Then you may find you would rather get a salad. You can apply it to exercise too. You don't have to go from a couch potato to a marathon runner overnight. Just get up a do a few loads of laundry. Turn the TV off and turn on some music. These are incredibly easy baby steps. You will be surprised how these little first steps will make you want more. You don't have to be just starting out to use this baby step philosophy either. No matter where you are in your journey you can always do one more little thing, so try it out.
Here are my little tips to starting out:
1. Don't be so hard on yourself. A negative attitude will get you nowhere. Tell yourself that you can do it. It may seem silly but it makes a really big difference. Talk to yourself like you would talk to a friend. If your friend is having a tough time, you wouldn't say "It's not worth trying, you're just going to fail." (If you would you probably don't have many friends.)
2. Set a small goal. You may want to lose 80 pounds or run a half marathon but that is going to take a while. Why don't you pick a small goal like losing 10 pounds or jogging 4 miles 3 days a week. These smaller goals will feel good to achieve and fuel your confidence for reaching bigger goals.
3. Don't let slips and hang-ups discourage you. You are not going to be perfect. My son falls over ten-thousand times per day but he gets right back up and tries again. If you do slip up, don't let it ruin the rest of your day. So you had a brownie for breakfast, it wasn't a great choice but that doesn't mean that you should give up and order a family-sized pizza for dinner. Take it one step and one choice at a time.
4. Start now. It is so easy to put it off. "I will start after my vacation", after my birthday, after Thanksgiving, after Christmas, after New Year's, after.... How about right now. You aren't doing yourself any favors by coming up with excuses, just take that first step now.
And in closing, I leave you with this recipe I swiped from someone else's blog, who apparently stole it from skirt.com:
Watermelon Water:
3 cups cubed chilled watermelon
1 cup coconut water
squeeze of fresh lime
Ice if needed
Sprig of mint
Put all ingredients in blender. Blend until smooth.
Makes two servings.
90 calories per serving.
http://skirt.com/dollybelle/blog/3-skinny-summer-blender-drinks-try
Note: I made this today and it was quite delicious. Of course I love watermelon, and I think coconut water is magical stuff. I did not have mint but it was still tasty. It didn't look like this picture though. It was a much deeper red color (I found a lovely deep red, super sweet watermelon) and it had a lot of watermelon pulp in it. If you don't like pulp you may want to strain this. I happen to like watermelon pulp though. I also spiked a glass of this with some dark rum so if there are typos in this post you will know why. ;-)
Thursday, July 19, 2012
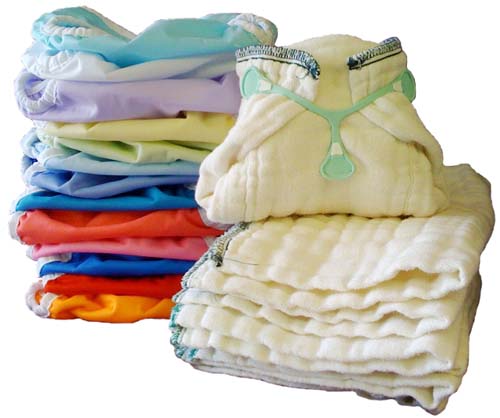
Cloth Diaper 101
Before I started using cloth diapers, I had no idea there were so many styles, fabrics, and gadgets. I've been using them for over 4 months and I am still learning. One of my frustrations was how overwhelming and confusing it was in the beginning. I would read posts in cloth diaper chat groups and have no clue what they were talking about. To top it off, they are notorious for using abbreviations and acronyms for EVERYTHING. It is pretty intimidating at first, and I don't think it should be like that. Hopefully I can make it a little less confusing for a newcomer.
Styles:
1. Prefold with Diaper Cover:
This is an old school method. You use the traditional rectangular cloth that most people use as a burp cloth now... they are called prefolds. One nice advancement is the Snappi. This is a fastener gizmo that allows you to hold the prefold on without safety pins. This is not waterproof so you need to put a cover on over it. They make covers that pull up or snap on the sides. The only advantage I see to this method is cost. It is very, very cheap. I am not hardcore enough to want to deal with these all day though. (Side note: Some people use prefolds as inserts or for extra absorbancy... I will explain later)
2. Fitted Diaper with Cover:

Prefolds are a pain to fold onto a squirmy baby. Fitted diapers solve this problem. They are shaped to fit your baby well and they snap closed. However, they are not waterproof so you still need a cover.
3. Pocket Diaper:

This is a waterproof diaper cover with a soft, thin layer of fabric on the inside... the two layers form a pocket that can be accessed through an opening at one end. You place an "insert" into the pocket for absorbancy. An insert is several layers of absorbant fabric sewn together. Pocket diapers are very common. They are nice because you can adjust the absorbancy by using different amounts/types of inserts and they are user friendly.
4. All-in-One:

This is like a pocket diaper only the inserts are sewn in. They are often sewn in on just one side to allow for easier cleaning and drying. This is the ultimate convenience diaper. They can be pricey but they are great for a cloth newcomer or someone that needs to convince a daycare or grandparent to use them. One disadvantage is you can't remove the inserts so you end up with a rather bulky diaper even if you don't need it.
5. Hybrid:

This is a waterproof diaper cover that holds an insert without needing to stuff it in a pocket. These are becoming popular because you can reuse the cover without washing it (as long as it doesn't get dirty). This is especially nice when you are on the go because you only need to pack inserts (and an extra cover just in case) in your diaper bag. You can use disposable inserts. I've tried them and I don't really understand what the point is, but some people really like them. (Side note: I would still recommend washing the covers every day or two. I use these and I usually throw the cover in the diaper pail after 3-4 changes.)
Fabrics:
1. Microfiber (MF):

These inserts consist of several layers of polyester microfiber terry cloth. They are generally the cheapest. They are much more absorbant than regular cotton but will release liquid when squished. They dry fast but have a reputation for holding on to stinky smells after awhile.
2. Bamboo:

These inserts cost more than microfiber but they are slimmer and more absorbant. One thing to keep in mind is the more absorbant the fabric, the longer the drying time. It is also advertised as having antimicrobial properties. I haven't researched this deep enough to elaborate on that.
3. Hemp:

These inserts are supposedly the most absorbant. They are also the most costly. I have never used them, but I have heard they take a very long time to dry and can become stiff as they get older. I have also heard that they take extensive prepping.
(Side note: "Prepping" is a procedure of preparing any brand-new insert for use, usually by washing multiple times and/or boiling. It is a pain, but you only have to do it once. It removes oils and residues from the fabric to make it more absorbant.)
4. Polyurethane Laminate (PUL):

Fabric that has a waterproof laminate backing. It is soft and flexible and can withstand high temperatures in a dryer. This is what most diaper covers are made of.
Other Features to Consider:
1. Snaps vs. Velcro (Aplix):

Snap closures are more durable and hold better. Velcro is much quicker and easier to fasten but it wears out, especially if you dry in the dryer on high heat. In my experience, the velcro made the fabric of the diaper lay awkward and it sometimes rubbed on my little guy's tummy.
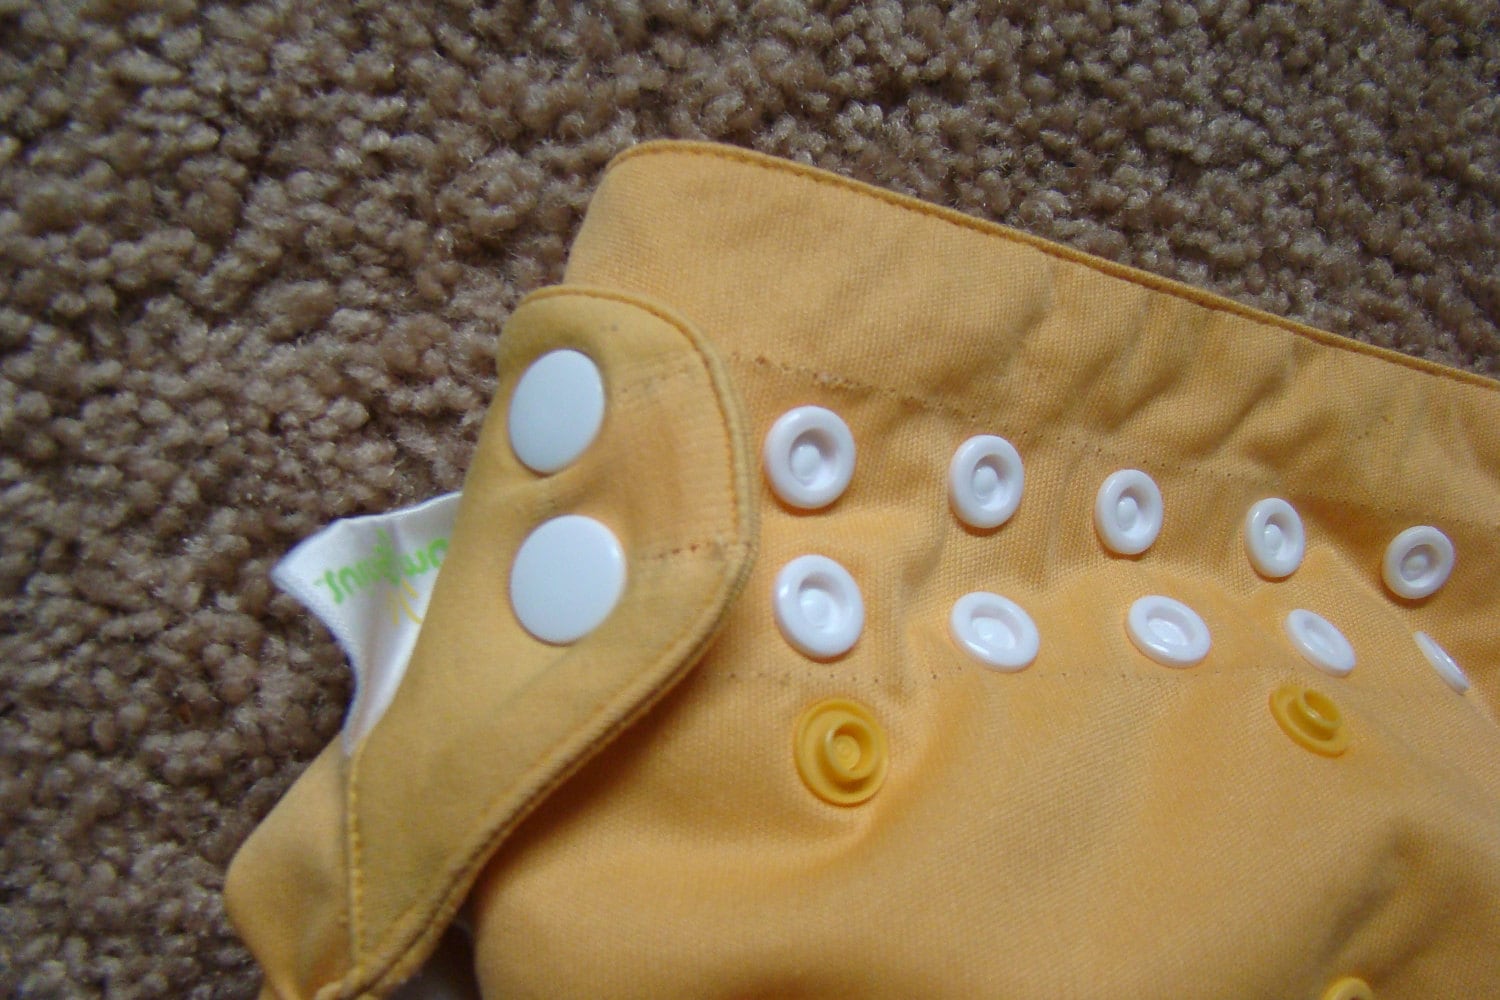
2. One Size (OS) Diapers:

These are diapers that can be adjusted in the rise (how high they come up on your baby), allowing them to fit a weight range of about 8-35lbs (depending on the brand). This is acheived by a series of snaps in the front that allow you to fold the fabric, making it shorter. This allows you to use one set of diapers for a long time. However, most newborns will be a little too small for a OS.
3. Liners:


These are thin sheets that can be placed in a cloth diaper to catch poop. It makes clean up easier and protects your diaper from some staining. There are disposable and reusable varieties. The downside to using these is you never know when your child is going to poop so you need to put them in every diaper even though most diaper changes are only pee. I used them for a while but I felt they were too much of a hassle.
Styles:
1. Prefold with Diaper Cover:
This is an old school method. You use the traditional rectangular cloth that most people use as a burp cloth now... they are called prefolds. One nice advancement is the Snappi. This is a fastener gizmo that allows you to hold the prefold on without safety pins. This is not waterproof so you need to put a cover on over it. They make covers that pull up or snap on the sides. The only advantage I see to this method is cost. It is very, very cheap. I am not hardcore enough to want to deal with these all day though. (Side note: Some people use prefolds as inserts or for extra absorbancy... I will explain later)
2. Fitted Diaper with Cover:
Prefolds are a pain to fold onto a squirmy baby. Fitted diapers solve this problem. They are shaped to fit your baby well and they snap closed. However, they are not waterproof so you still need a cover.
3. Pocket Diaper:
This is a waterproof diaper cover with a soft, thin layer of fabric on the inside... the two layers form a pocket that can be accessed through an opening at one end. You place an "insert" into the pocket for absorbancy. An insert is several layers of absorbant fabric sewn together. Pocket diapers are very common. They are nice because you can adjust the absorbancy by using different amounts/types of inserts and they are user friendly.
4. All-in-One:
This is like a pocket diaper only the inserts are sewn in. They are often sewn in on just one side to allow for easier cleaning and drying. This is the ultimate convenience diaper. They can be pricey but they are great for a cloth newcomer or someone that needs to convince a daycare or grandparent to use them. One disadvantage is you can't remove the inserts so you end up with a rather bulky diaper even if you don't need it.
5. Hybrid:
This is a waterproof diaper cover that holds an insert without needing to stuff it in a pocket. These are becoming popular because you can reuse the cover without washing it (as long as it doesn't get dirty). This is especially nice when you are on the go because you only need to pack inserts (and an extra cover just in case) in your diaper bag. You can use disposable inserts. I've tried them and I don't really understand what the point is, but some people really like them. (Side note: I would still recommend washing the covers every day or two. I use these and I usually throw the cover in the diaper pail after 3-4 changes.)
Fabrics:
1. Microfiber (MF):
These inserts consist of several layers of polyester microfiber terry cloth. They are generally the cheapest. They are much more absorbant than regular cotton but will release liquid when squished. They dry fast but have a reputation for holding on to stinky smells after awhile.
2. Bamboo:
These inserts cost more than microfiber but they are slimmer and more absorbant. One thing to keep in mind is the more absorbant the fabric, the longer the drying time. It is also advertised as having antimicrobial properties. I haven't researched this deep enough to elaborate on that.
3. Hemp:
These inserts are supposedly the most absorbant. They are also the most costly. I have never used them, but I have heard they take a very long time to dry and can become stiff as they get older. I have also heard that they take extensive prepping.
(Side note: "Prepping" is a procedure of preparing any brand-new insert for use, usually by washing multiple times and/or boiling. It is a pain, but you only have to do it once. It removes oils and residues from the fabric to make it more absorbant.)
4. Polyurethane Laminate (PUL):
Fabric that has a waterproof laminate backing. It is soft and flexible and can withstand high temperatures in a dryer. This is what most diaper covers are made of.
Other Features to Consider:
1. Snaps vs. Velcro (Aplix):
Snap closures are more durable and hold better. Velcro is much quicker and easier to fasten but it wears out, especially if you dry in the dryer on high heat. In my experience, the velcro made the fabric of the diaper lay awkward and it sometimes rubbed on my little guy's tummy.
2. One Size (OS) Diapers:
These are diapers that can be adjusted in the rise (how high they come up on your baby), allowing them to fit a weight range of about 8-35lbs (depending on the brand). This is acheived by a series of snaps in the front that allow you to fold the fabric, making it shorter. This allows you to use one set of diapers for a long time. However, most newborns will be a little too small for a OS.
3. Liners:
These are thin sheets that can be placed in a cloth diaper to catch poop. It makes clean up easier and protects your diaper from some staining. There are disposable and reusable varieties. The downside to using these is you never know when your child is going to poop so you need to put them in every diaper even though most diaper changes are only pee. I used them for a while but I felt they were too much of a hassle.
Subscribe to:
Posts (Atom)